Posts

Showing posts from April, 2012

Co-washing my Twists

Image
Last week, I saw a YouTube video where a lady co-washed her two strand twists, and after doing so, her twists were still intact.  So, I was curious to try this method, even though, I did not have much confidence that it will work with my two textures.  The lady was natural. Here is my journey into the unknown... I diluted some TRESemmé Natural, Nourishing Moisture Conditioner and water in an application bottle. Recently, when I shampoo or co-wash my hair or the girls' hair, I always use the application bottle filled with the shampoo/condition and water mixture. I find it much easier and more penetrating to reach the scalp.  I saturated my twisted hair with water, and proceeded poured the conditioner mixture onto my scalp. Then, I massaged my scalp gently. Using cold water to rinse my hair helped to close my hair cuticles. This cold water rinse helps to make my hair more shinier, softer, and sleeker. After the rinse, I dried my hair with a clean T-shirt.  My...

Friday Fun: Bling Flip Flops

Image
With the weather getting warmer, and summer peeking around the corner, I decided to buy some new flip flops for me and the girls.  I did not want the flip flops to be too plain, so we decided to do a simple craft project with our new flip flops. Here is how we created these bling flip flops. You will need: A pair of clean Flip Flops Acrylic Jewels Super Glue or Epoxy Glue Step One Pick out the jewels and sort according to the pattern you want to create on the Flip Flop straps.  The girls had so much fun creating patterns, but settled on A-B pattern.  Wonderful Pattern Teaching experience ;) Step Two Use either Super Glue or Epoxy Glue to stick the jewels onto the straps.  Step Three Start gluing the jewels from center to end of one strap, then work on the second strap, center to end of the strap. End Results.... You can also use ribbons and fabric flower applique.

Product Review: Organic Root Stimulator Hair Mayonnaise

Image
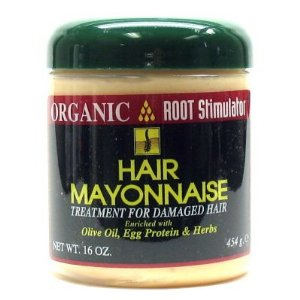
 What is Organic Root Stimulator Hair Mayonnaise? Organic Root Stimulator Hair Mayonnaise is a protein treatment product for dry, damaged hair. It rejuvenates the hair with moisture and elasticity to mend split ends and provide incredible body and shine. Ingredients Water Aqua, Polyquaternium 32, Glycerin, Safflower Oil Carthamus Tinctorius, Hydrolyzed Collagen, Behentrimonium Methosulfate, Cetyl Alcohol, Olive Oil Olea Europaea, Dicetyldimonium Chloride, Lanolin, Dimethicone, Phenyl Trimethicone, Panthenol Vitamin B5, Cholesterol , Stinging Nettle Urtica Dioica , Capsicum Extract Paprika , Hydrolyzed Keratin, Egg Powder Ovum, Sodium Lauryl Sulfate, Propylene Glycol, DMDM Hydantoin, Diazolidinyl Urea, Methyl Paraben, Propyl Paraben, Brown No. 1 CI 20170, Fragrance Parfum, Benzyl Benzoate, D'Limonene, Linalool, Alphaisomethylionone *Note: This product contains Sodium Lauryl Sulfate. Do not leave in your hair longer than 20 minutes because it can cause drynes...

To Trim or not to Trim...

Image
While examining the ends of my hair, I noticed that they were a bit straggly.  I didn't find any split ends, so dusting was out of the question.  Now, you might be wondering, what does Dusting have to do with hair? Well, dusting is the process of performing a seek and destroy of split ends, in which, you cut off about 1/8th of the ends of a hair strand.  Whereas, trimming is essentially cutting off 1/2 an inch or more of the ends of your hair, all around.  I decided to get about 1 1/2 inches to 2 inches trimmed off.  After the trim, it was time to get my Protein Treatment. The reason why I wanted to do this was because I noticed that my hair seemed to be losing some elasticity.  Although moisturized, it did not have that bounce-back effect when pulled.  I used Organic Root Stimulator Hair Mayonnaise to perform this process. After the treatment, I used Tresemme Naturals Nourishing Moisture Conditioner (Aloe Vera and...

Clarify Your Hair

Image
Why do I need to clarify my hair?   Clarification of your hair is necessary to remove product build up that can be accumulates on the scalp and hair.  By clarifying with a sulfate shampoo  the product build up is lifted and removable for cleaner and healthier scalp. For me, clarifying my hair gives it a fresh start and provides my hair with better shine.  How often should I clarify my hair? This depends on how much product you put in your hair. I tend to use mostly oils and not heavy creams on my scalp. I do apply my shea butter mix to seal my ends once a week. I only clarify once a month at the end of the month.  The average person usually clarifies 1-2 times a month. How do I clarify my hair? In the picture at the top of this post is my hair after taking down my 10 day cornrows style. I had been experiencing some itchiness , and knew it was time to clarify! This is how I clarify my hair: Pre-poo Hair This is a VERY ...

Product Review: Eco Styler Gel (Moroccan Argan Oil)

Image
What is Eco Styler Gel (Moroccan Argan Oil)? Eco Styler Gel (Moroccan Argan Oil) is an alcohol free gel that promises maximum hold of 10.  It is made with 100% Moroccan Argan Oil. Ingredients Water, Carbomer, Hydrolyzed Wheat Protein, PVP, Glycerin, Trithanolamine, Sodium Hydrxymethylglycnate, Plysorbate 20, Tetrasodim EDTA, Argan oil, Fragrance, Yellow #11, Benefits Provides maximum hold Creates shine to hair Smoothens hair Conditions hair How I use Eco Styler Gel (Moroccan Argan Oil)? I decided to use this gel on my transition hair to do my braids.  When I worked this into my bang area, I noticed that the gel was more watery than the Eco Styler Gel (Krystal). It also was not as sticky.  When I started to work on the section of hair that was closer to my right ear, I noticed that this product tangled my hair.  The gel locked up at the demarcation line between my natural hair and my relaxed hair.  Once t...

Friday Fun: Save Water while Washing your Hair

Image
This Sunday, April 22nd 2012, is Earth day. According to Wikipedia, Earth Day is a day early each year on which events are held worldwide to increase awareness and appreciation of the Earth 's natural environment . I have been thinking of ways to save water during my weekly washing of my hair.  Since I chickened out and could not keep my cornrows for more than 10 days, what better time to try out this shampoo technique. Here is a YouTube video of how to wash your hair with less water. This is not me... =) To rinse off, you can fill a bucket with water, and use a small bowl/cup to pour the water onto your head.  This was how my mother washed my hair when I was a little girl.

Product Review: Glycerin Oil

Image
What is Glycerin? Glycerin ( Vegetable Glycerin)  is a humectant which means it attracts moisture from the air. This thick oil is added to various beauty products because of its hygroscopic properties. Benefits of Glycerin Moisturizes dry hair and scalp Softens hair Conditions dry, frizzy, and brittle hair Alleviate irritated dry, flaky scalp Promotes growth Strengthens hair to help prevent breakage How this has helped me. My youngest daughter has been experiencing dryness in her hair, even though the hair has been previously moisturized with a non glycerin product.  I decided to change her moisturizer to one that contains Glycerin. Her hair felt soft and quite moisturized. She has not had any dryness in her scalp.  I believe that due to the change of weather, it's getting more humid, our daily regime needs to include Glycerin. People worry about using Glycerin because they feel it might cause their hair to...

Dealing with Itchiness... and EarFlaps!

Image
I've had my cornrows now for a week, and started experiencing some itchiness! It's driving me crazy! Anyways, decided to visit the Beauty Store Shop to find a product I can use to give me some relief. Got a bit sidetracked by the huge selection of wool earflaps. LOL! Sorry for the outfit, just coming back from the gym. Back to my search.... After looking at products geared towards itchy scalp, and finding issues with one ingredient or the other, I decided to go home and try some tea tree oil on my scalp. I first sprayed my hair with water and applied some tea tree oil to the affected areas. So far, so good... If the itchiness returns, I plan to try the following: Apple Cider Vinegar Rinse Washing my hair (still in cornrows) with a little shampoo mixed with Tea Tree Oil. And for everyone who thinks itchy scalp means your hair is growing... well... that's a myth! Read more about it here . How do you deal with itchy scalp?

The 3 Phases of Long Term Transitioning

Image
As you all know, I am transitioning from relaxed to natural by not doing the "Big Chop" and just letting my hair grow, while trimming the relaxed ends every 2 months.  I am in the process of entering my 6th month of transition. *Yeah! I found a video on YouTube that gives a good explaination of the 3 phases of Long Term Transition.  Here is the breakdown of the three phases: Phase 1: New Growth (0-6 months post relaxer) Phase 2: Protective Styling (6-12 months post relaxer) Phase 3: Blending (12+ months post relaxer)       Thanks to the LHDC-TV Channel for this video!

The Curl Commandments for Natural Hair

Image

Friday Fun: 1 Broken Bracelet + 1 Glue Gun = 2 New Accessories

Image
Over the years, I have bought a lot of bracelets. In the past, if one of these bracelets break, I just throw it away and buy another one. Well, I have decided to start repurposing my broken bracelets. Here is how I took one  broken bracelet and turned it into a ring and a hair accessory You will need: Broken bracelet or necklace with different decorative beads Ring band Glue gun Headband Scissors Step One: Seperate the decorative beads and charms by cutting off the thread that connects them. Step Two: Assemble each of the beads and charms for easy access.  Determine which part you will use for the ring and the headband Making the ring: I choose to use this beautiful bracelet charm. Making a horizontal ring Step One:  Using the glue gun, put some glue on the ring band. Step Two: Attach the decorative charm, horizontally on the ring band. Hold against the ring band for a couple of seconds. Her...

Product Review: Taliah Waajid Kinky, Wavy, Natural Herbal Style & Shine

Image
What is Taliah Waajid Kinky, Wavy, Natural Herbal Style & Shine? This is a styling product that promises to soften, shine, moisturize, detangle and make it easier to style and manage hair. It can be used on both the hair and scalp.  It adds moisture to the hair and helps with dry hair. Ingredients PEG-75 Shea Butter (Butyrospermum Parkii) , Glycerides , Deionized Water , Aqua , Glyceryl Stearate , Cetearyl , Stearic Acid and Sodium Cocoyl Glutamate , Glycerin , Sage Extract , Green Tea , DMDM Hydantoin , Vitamin E Oil , Silk Protein , Fragrance Benefits of using Taliah Waajid Kinky, Wavy, Natural Herbal Style & Shine Can be used on all hair textures Softens hair Reduces breakage Helps detangle hair for easy combing and styling Conditions and adds sheen to hair Moisturizes hair How do I use Taliah Waajid Kinky, Wavy, Natural Herbal Style & Shine I have always used Shea Moisture Curl Enhancing Smoothie (SMCES) to style my younger daughter's hair. ...

Friday Fun: Ice Cold Water Dipping

Image
For the past seven months, I have been battling acne. Not sure what is causing it, because I never experienced this as a teenager.  I have tried different things and some worked for a while, and others just made things worse. When I told my friend about what was going on, she told me about what she does, and I decided to give it a shot. My friend said she does a "Ice Cold Water Dipping" process.  Here is what you do: Wash your face with facial wash and rinse with warm water and towel dry Get a big bowl and fill it with a lot of ice cubes and water; enough to fully immerse your face I was quite nervous to do this.... hence why I look so scared! LOL Dip your face into the ice cold water for a couple of seconds; about 10 seconds The "over-achiever" in me decided to do this for 30 seconds. *Yikes! Ouch! Arrrrrrrrrggggghhhhhhhh! Try not to touch your face for a couple of seconds. You might experience a tingly, icy sensation.  Benefits o...

Letting other people handle your hair

Image
Since I started transitioning, I have always done my hair by myself. I really do enjoy doing my hair, even though at times, it can be quite tiring.  I have this fear of letting other people handle my hair because of the current fragile state of my hair.  So, when my friend offered to cornrow my hair, I was a little bit nervous, but I agreed.  First of all, I don't comb my hair when styling it.  I usually finger detangle my hair and then style it. As I do each twist, cornrow, or braid, I unknot any tangled hair.  This works well for me, and helps reduce so much breakage. Before you allow anyone to do your hair, you should tell them how to handle your transitioning hair.  I made sure to tell my friend that I did not want her to comb my hair.  Whenever, she encounted a knot, she tried to undo it, or she let me undo it myself.  Yes, it took WAY longer than it should have but I was happy about the experience and the results.

Update: The Pineapple Method

As you all remember, I tried out the pineapple method yesterday during my night routine, well, here is my results. Drumroll...... It did not turn out well.  My curls were FLAT . Maybe the bonnet I put on top of my hair was what caused the curls to become flat!  It was so bad that I did not even take pictures.  If at first you don't succeed, try, try and try again I will definitely be trying this again. And I promise to take pictures even if I fail yet again!

Night Routine: Pineapple Method

Image
Your night routine can make or break your braid out or twist out style.  There are several ways of preserve the curls that are created from the braidout or twistout style.  One way is to rebraid/retwist the hair in sections prior to sleeping. Another way is the by doing a "Pineapple Method". Here is a video on how to pineapple natural hair ( not me) I decided to try it out.  It was quite easy to do, however, I was not too comfortable with leaving my hair exposed, so I covered it with a satin bonnet. My first Curly Afro Puff I used a scunci to hold my hair up on top of my head, and wrapped with my long scarf Secured my bonnet on top *fingers crossed* I will post what my hair looks like in the morning!  Good night, friends!

Friday Fun: April Flowers and Sunshine

Image
I enjoy being creative when I do hairstyles for my friends' kids. I always tell them that it is one of my stress release mechanism.  Here are a couple of my favorite designs: April Flowers                                Sunshine I remember the first time I braided my daughter's hair, she was about 5 months old. The style lasted.....for  10 mins.  Yes! 10 mins! She ran her baby fingers over her head, and the cornrows unravelled. It was quite comical.  I didn't give up, but continued trying and over the years, with much practice, I am happy that I didn't give up.